
9 Things to Check Before Hitting Post on TikTok
/
So you’ve created an awesome TikTok and you’re almost ready to share it with the world. But wait! There are several things you need to check before you hit the big red ‘Post’ button. Reviewing these items is essential for optimizing your content so the algorithm knows who to serve it to. I’ll walk you through all the fields to check before hitting post so that your content can perform its very best.
1) Hidden SEO keywords
Hidden SEO keywords are not an official field in TikTok, but I’ve found that including them can be a powerful tool for helping my videos reach the right people. I conducted an experiment using hidden SEO keywords in June 2023, and my video views improved significantly. I always hide 3-5 keywords within the video itself; a viewer can’t see them, but the algorithm reads them and sorts the video accordingly.
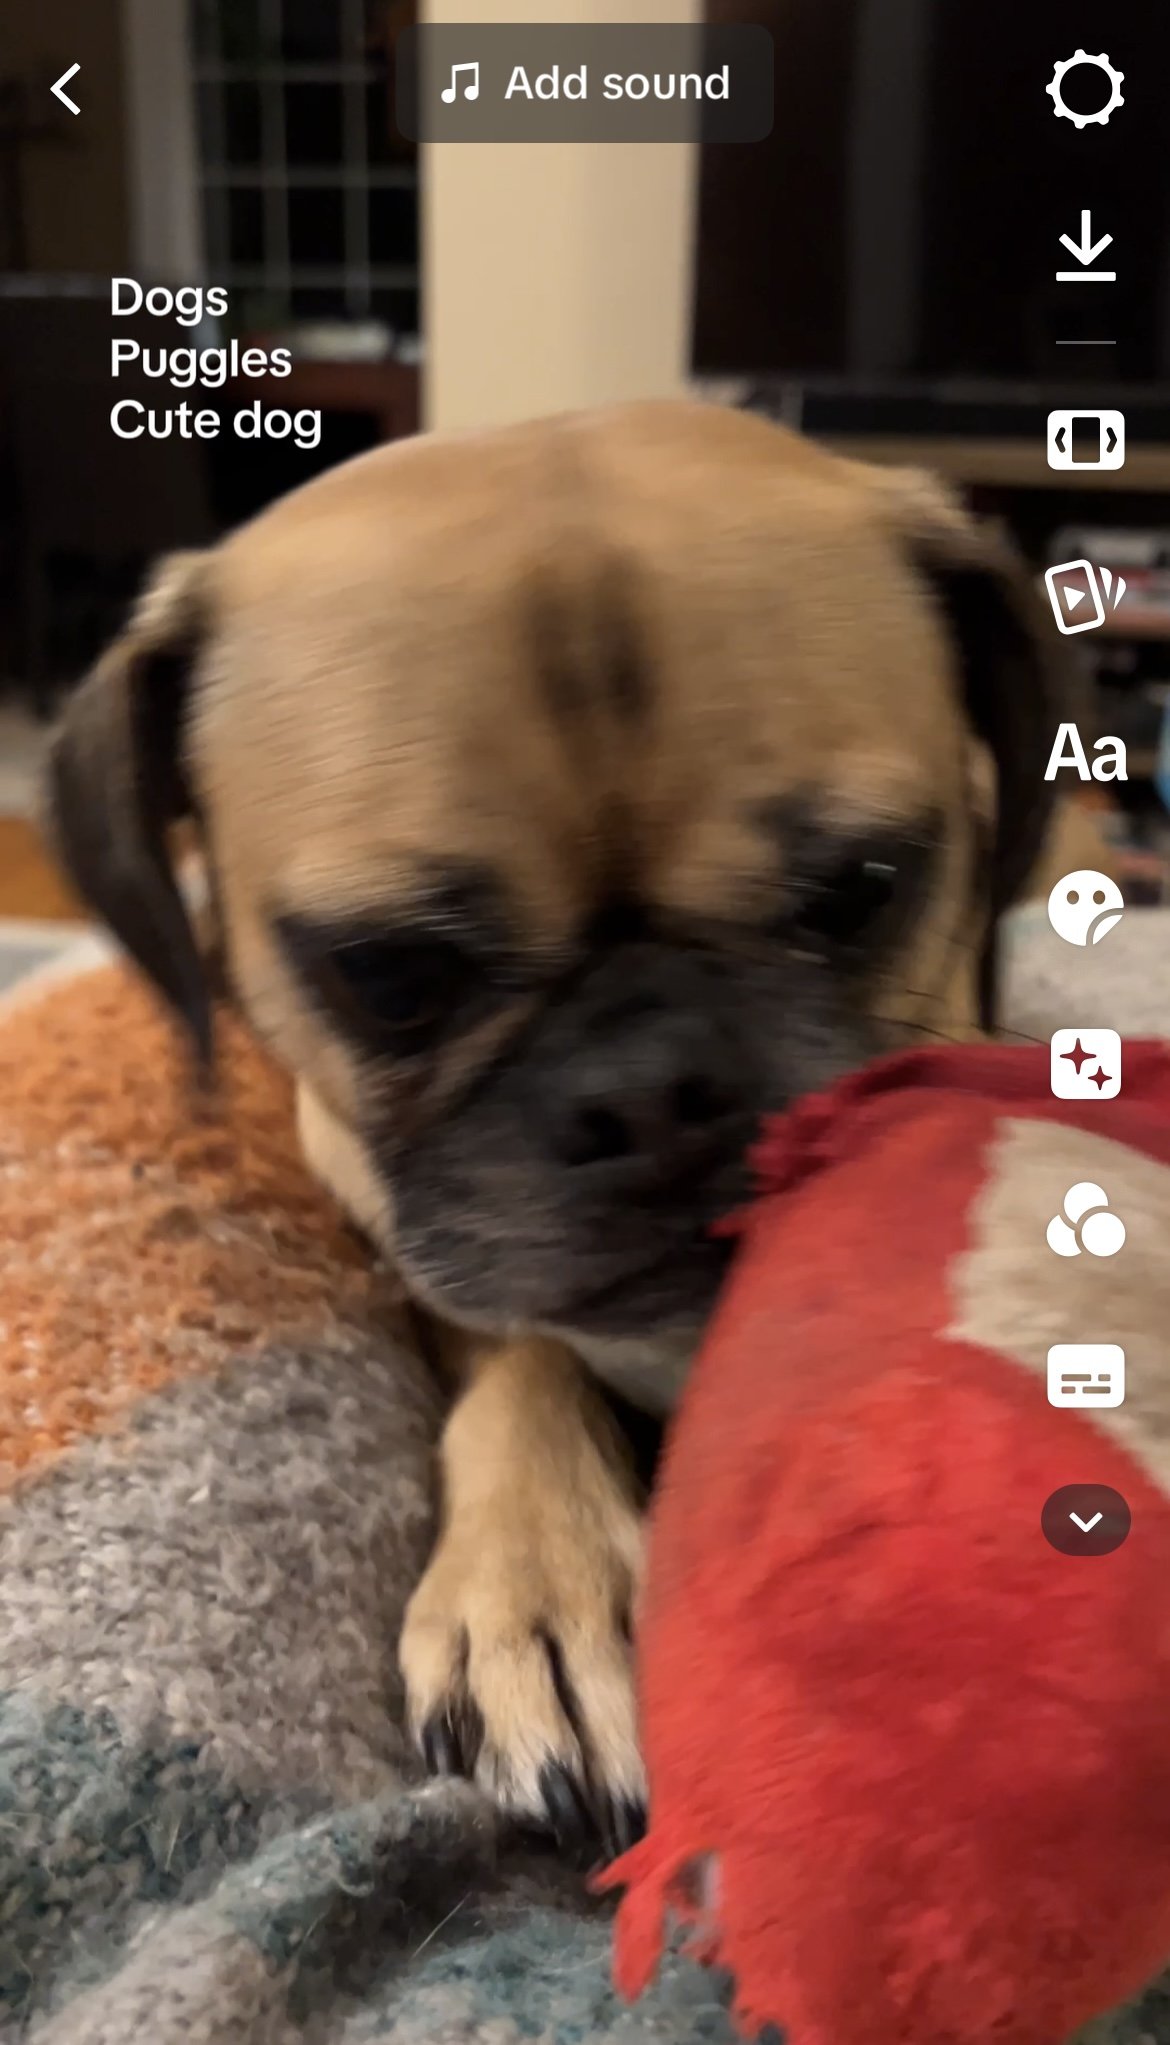
hidden seo keywords on a video of my dog
2) Caption
Crafting a great TikTok caption is tricky. Should it be long or short? Clear or mysterious? Kelsey Sweet, social media strategist for the Buffalo Bills, explained that they often try to write a TikTok caption that doesn’t give away the video. They write a compelling hook that will get someone to watch.
Lately, I’ve seen folks writing much longer captions. You now have 4,000 characters–which is a ton–so you can definitely be educational in this space! People move quickly on TikTok though, so personally, I tend to keep it short and sweet. Either can be effective; consider which one makes more sense given the type of content you create and the attention span of your target audience.
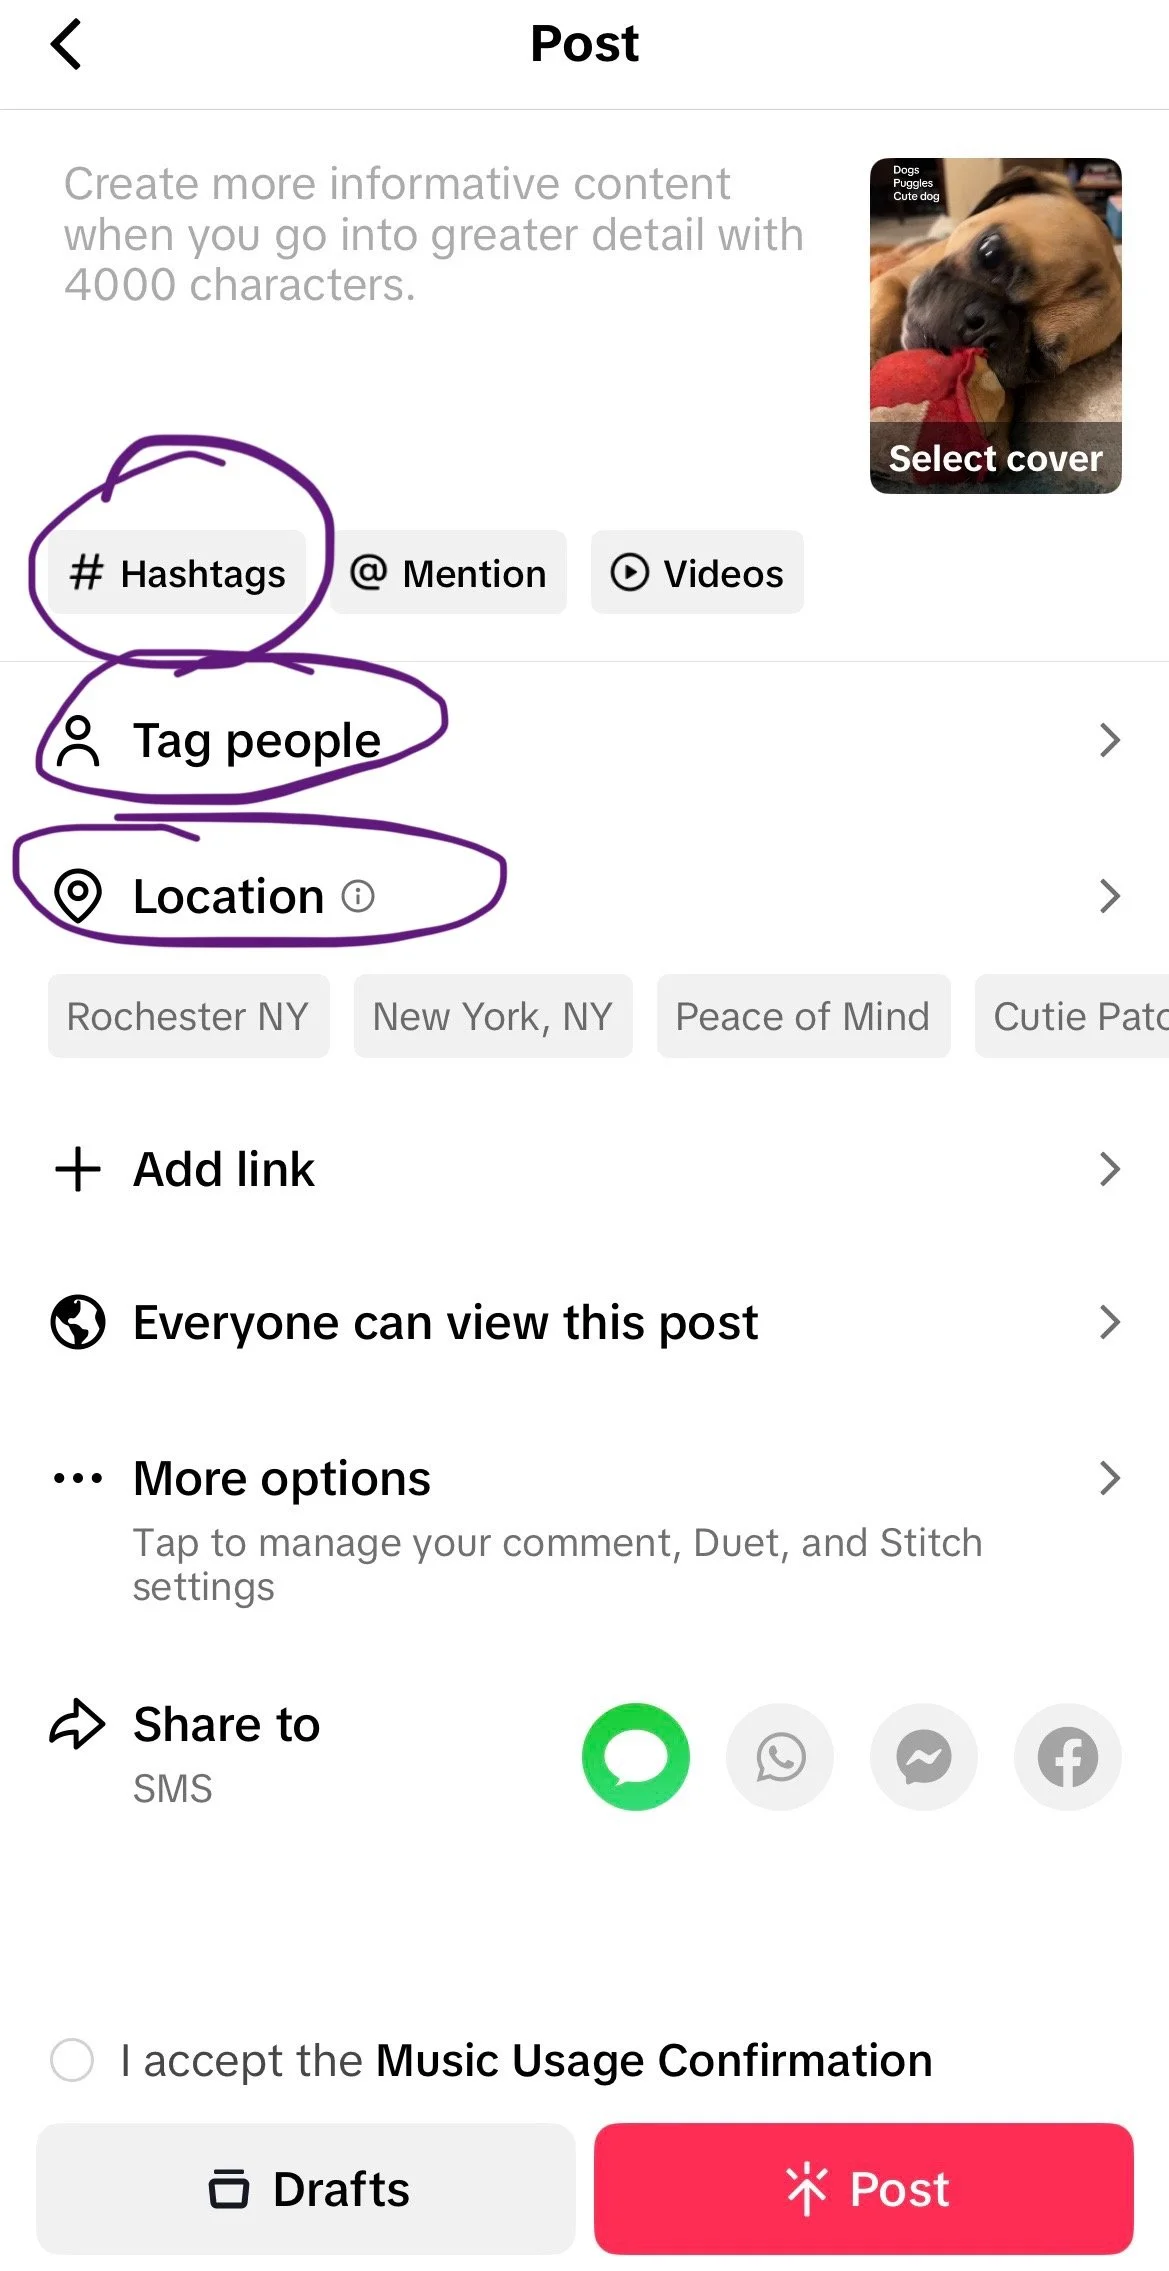
3) Hashtags
Last year, I wrote all about how hashtags work on TikTok. My main findings?
Use 1-3 hashtags, or 6-8 at most
Hashtags like #fyp, #foryoupage, or #viral don’t actually help you land on people’s FYPs or go viral.
There’s no need to include hashtags in the comments section–the algorithm doesn’t weight them as heavily as hashtags in the caption itself, so they’re not super effective.
And of course, keep experimenting with hashtags to see what serves you and your content best!
4) Location
Depending on your goals, you may want to add a location to your video before you hit post. Personally, I’m not trying to reach folks in my geographic area, so I leave the location off. For some of my clients, such as PUSH Physical Theatre, I always add a location before posting. Why? Often, they’re performing in other cities, so we want that content to reach folks in that geographic area so they’ll buy tickets to a show! PUSH also does lots of work in the community here in Rochester, so we want our local community to see that content.
adding a location and tagging people
5) Tag people
This step won’t be necessary every time, but if you’ve featured someone in your video, tag them! Whether it’s a business partner, a friend, or another brand, it’s always worth tagging them. This can help your followers discover their work! It also makes it easy for the account you tagged to engage with and re-share your video.
6) Add link
Again, not every video will require you to add a link, but if you sell products through TikTok Shop, you’ll want to use this feature heavily! When linking to a product in your TikTok Shop, TikTok often boosts those videos in the algorithm because they want to promote shopping to their users. Keep in mind: you can only add a link if the product is visible in the video. If you’re not actually showing the product, you can’t just add links in willy nilly.
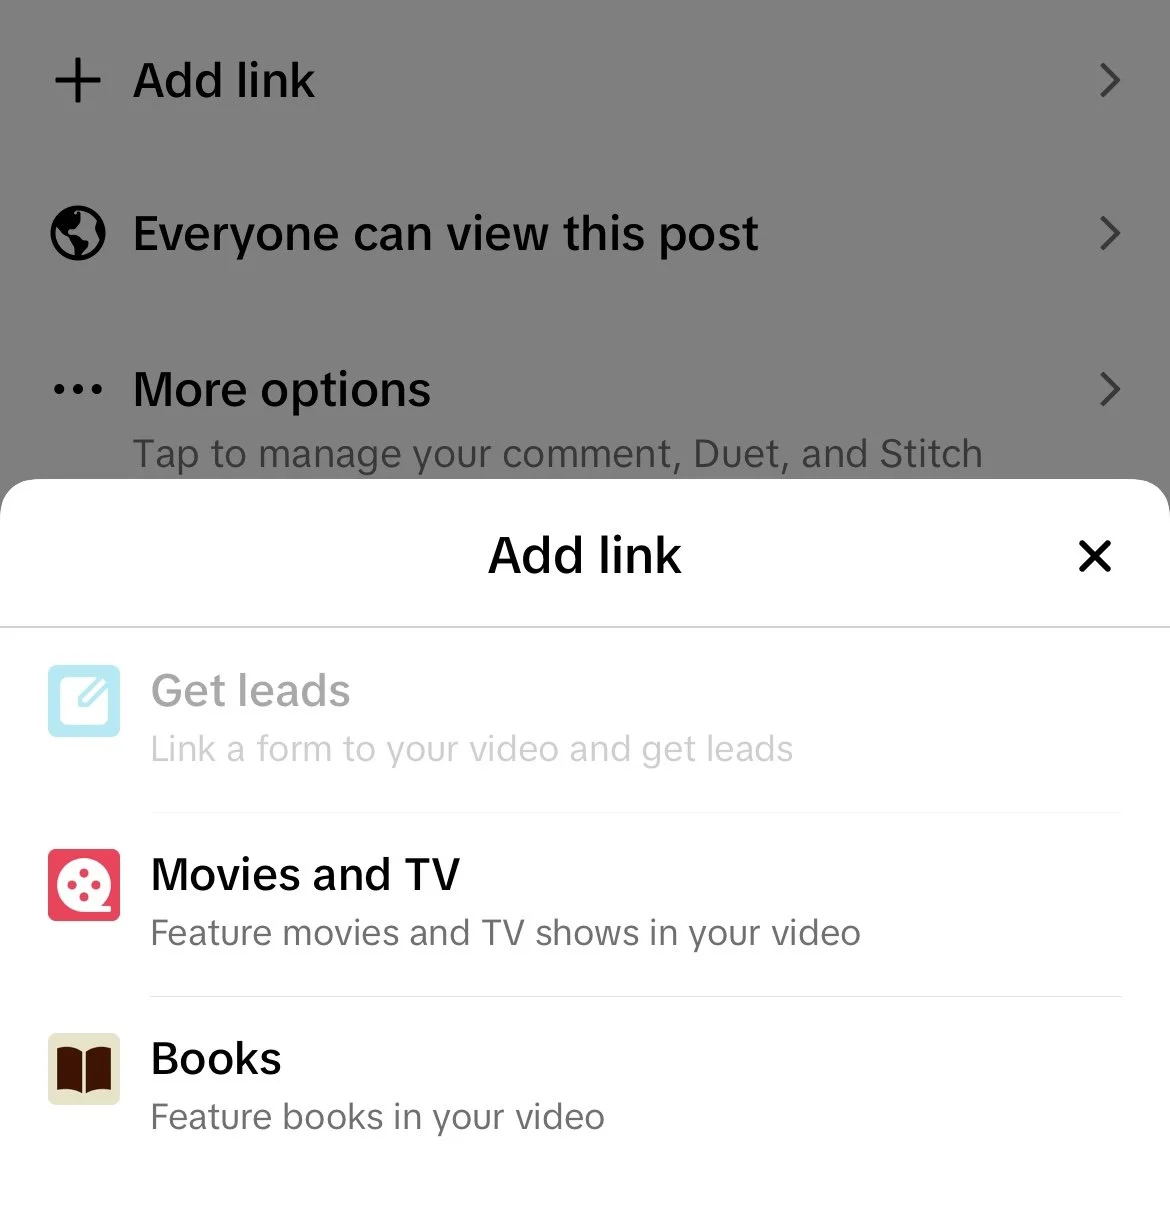
adding a link
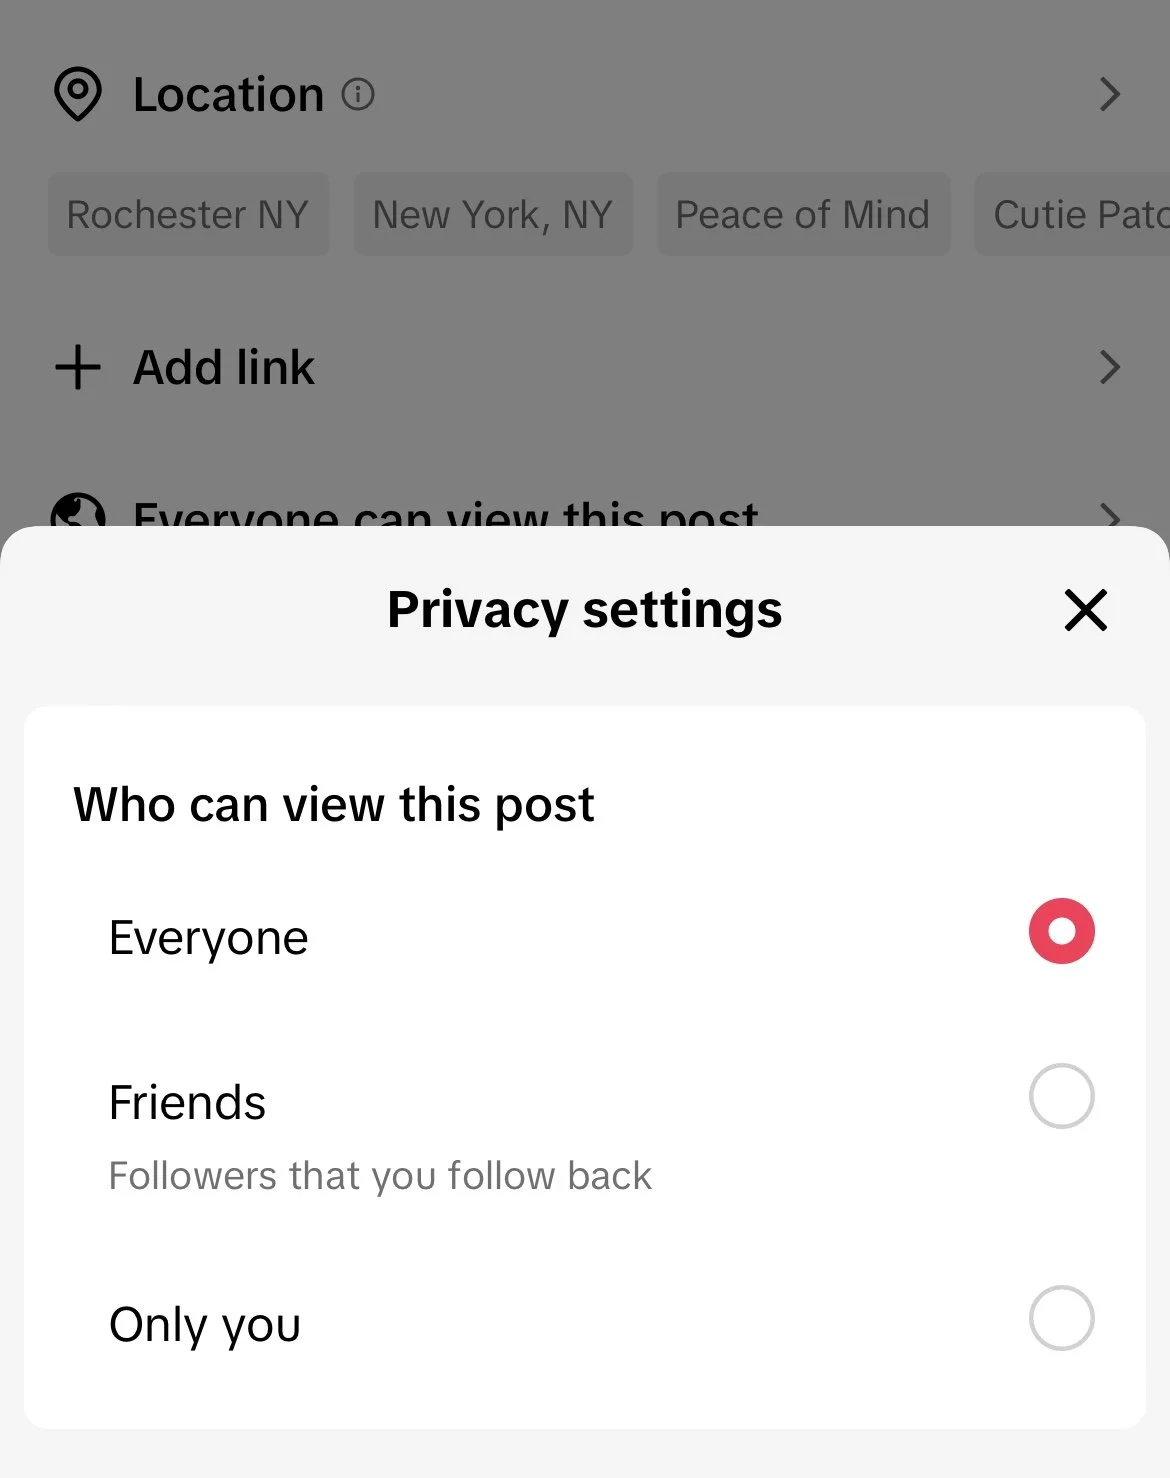
7) Privacy settings
Make sure to check your privacy settings before posting! You can select Everyone, Friends Only, or Only You. When trying to grow a following, you’ll generally always want to select ‘Everyone.’ In some instances, ‘Friends Only’ can be useful, like if you’re trying to gather feedback from your mutuals.
privacy settings
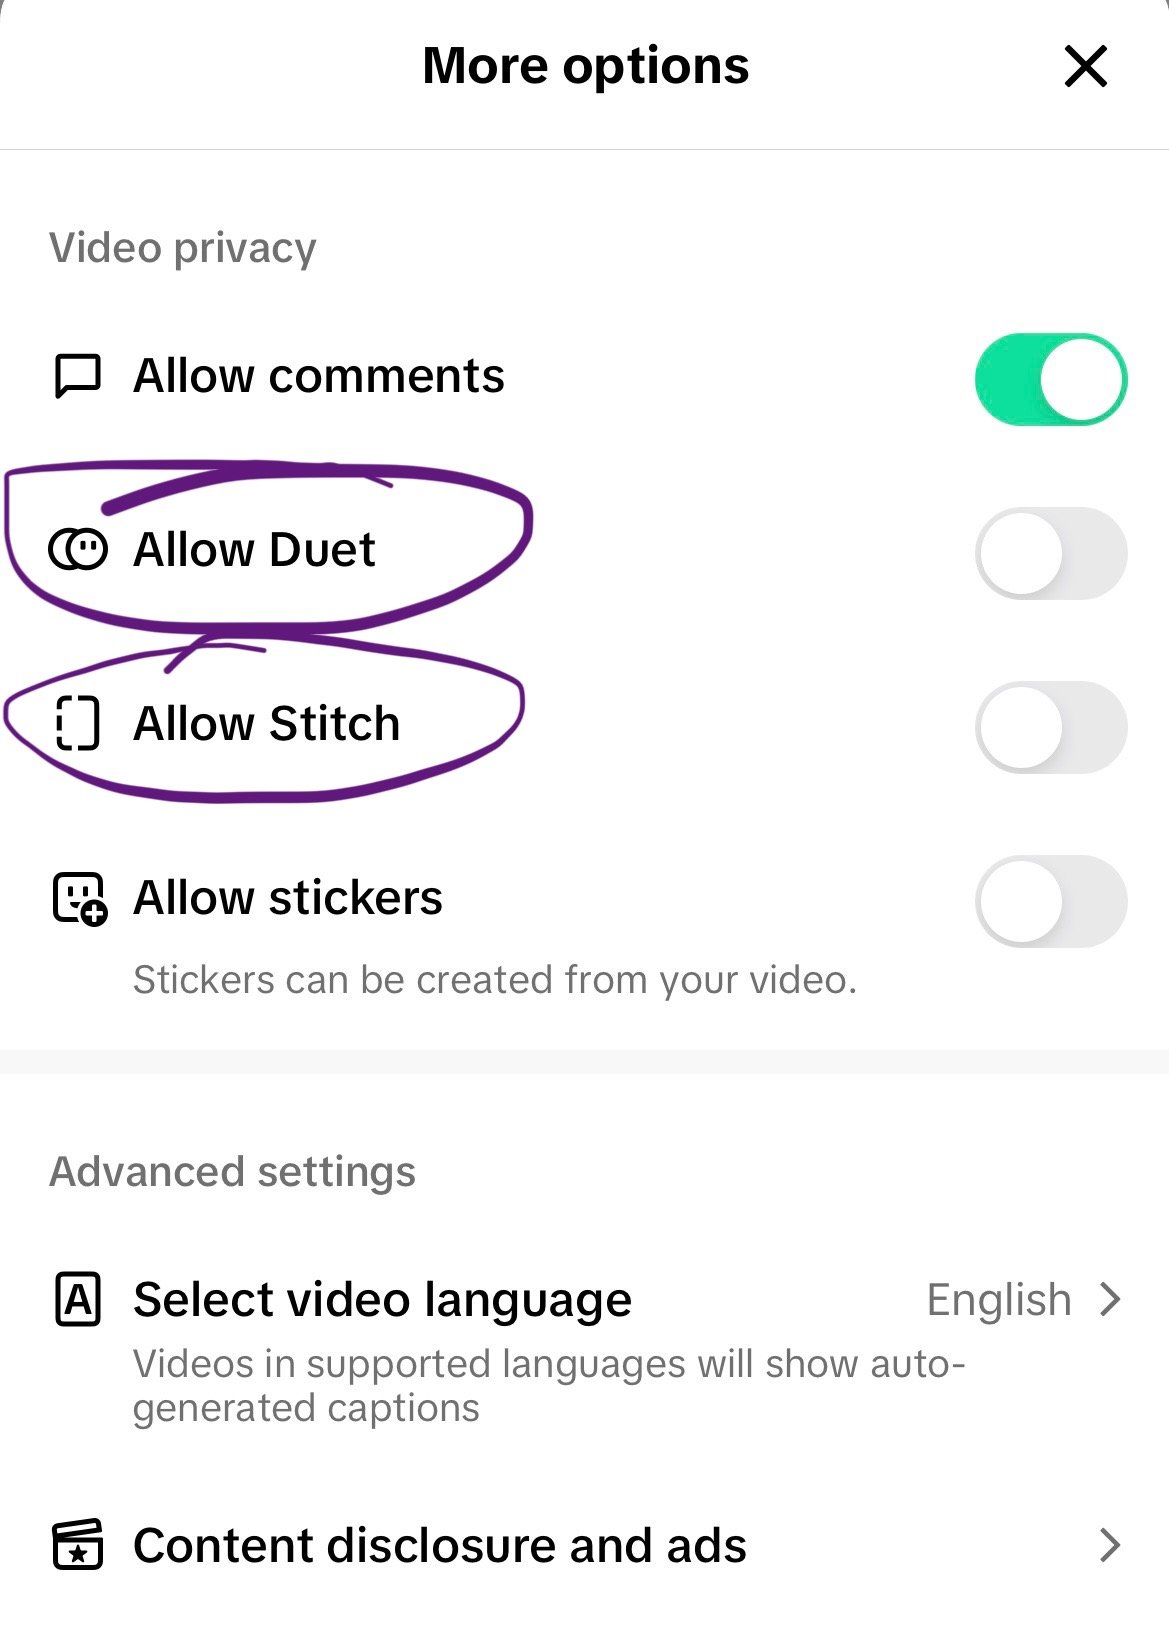
8) More options → Allow Duets & Stitches
Under ‘More options,’ there are several things you can check. The most important (to me at least) is Duets and Stitches. I always turn off duets and stitches. Personally, I find the thought of thousands of people dueting or stitching me terrifying, so I keep that feature off 100% of the time. If you’re looking to grow your following, they can be effective for brand awareness, so you may want to leave them on!
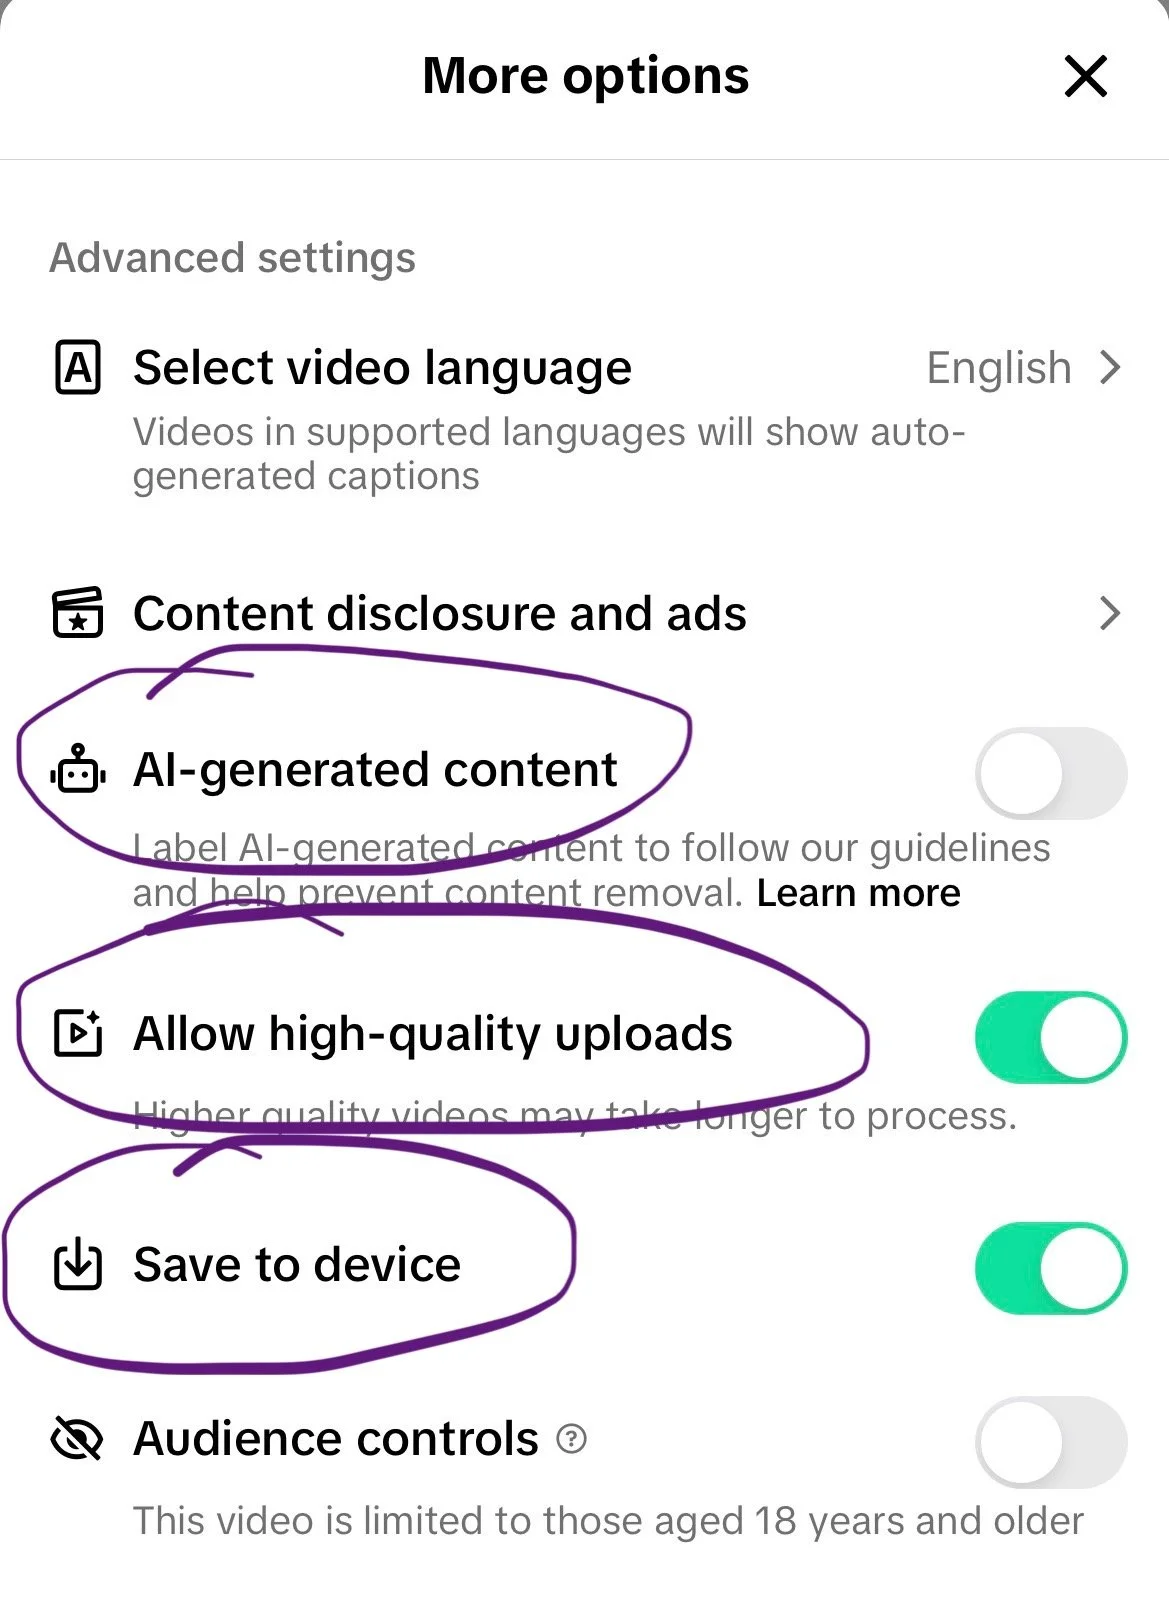
Other things to review here:
Allow high-quality upload – I turn this on. Higher video quality is worthwhile!
Save to device – I turn this on as well. That way, if TikTok goes away someday, I have the actual videos saved.
AI-generated content – You can turn on this label to indicate that your video or images were AI-generated, which helps reduce the spread of misinformation. I love this feature! I hope Meta-owned platforms will follow suit.
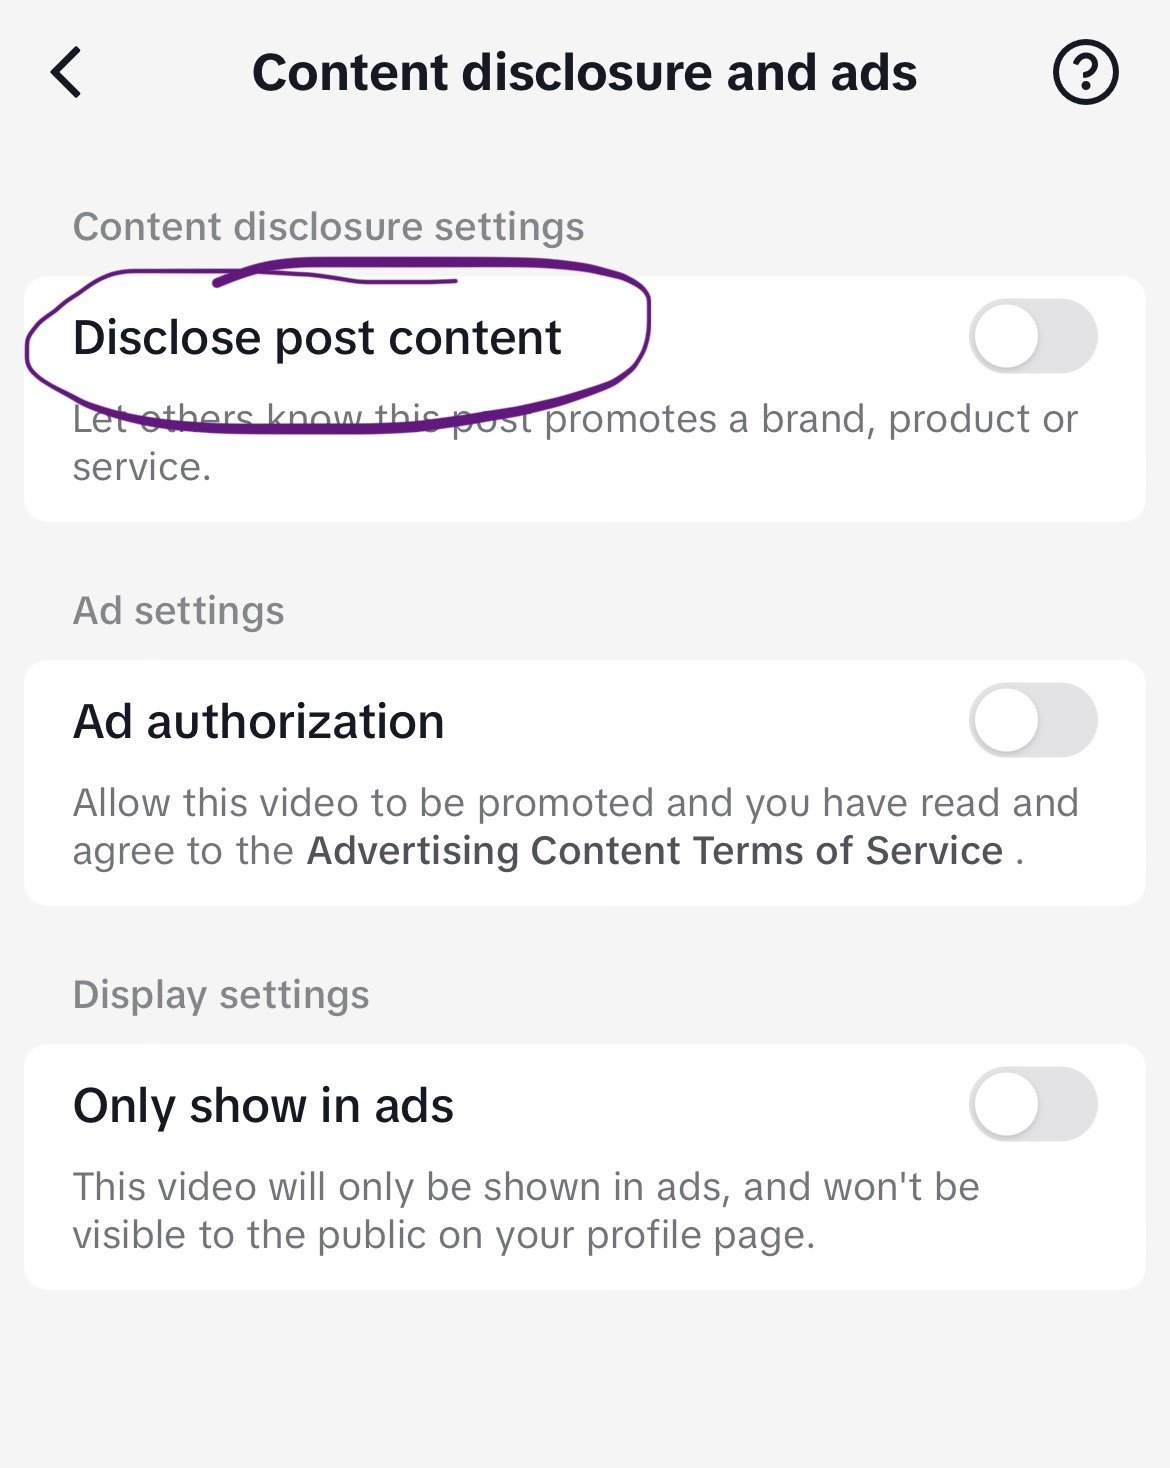
Content disclosure → Disclose post content – If you’re participating in a paid partnership with a brand, you’ll need to disclose that. You can turn that on here.
9) Accept the Music Usage Confirmation
Last but not least, you’ll need to check the ‘I accept the Music Usage Confirmation’ button at the bottom. TikTok will not allow you to post unless you’ve done so. This means you have the right to use this music on TikTok. If you have a business account, you are limited to the Commercial Music Library, so typically anything you’ve selected from there is fair game.
To learn more about TikTok, check out these posts:
For more social media insights, check out my unboring email newsletter!
